Friday, April 19, 2013

Game Entity controlled states

In this post I'll show how to create a game entity controlled states.


Standing

A entity has only one state: stand. It is very easy to implement. It is quite common that after some period of inactivity entity performs some action. For example, it looks around, shuffle around, etc.


Our entity turns direction after some time of inactivity.



Looking


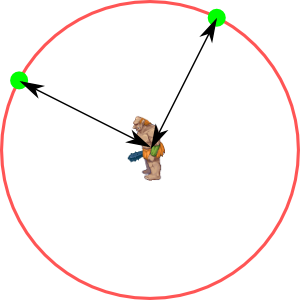
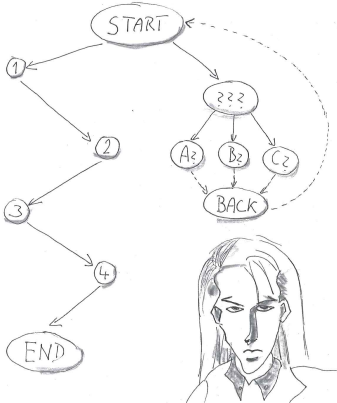
A entity has two states: moveTo, stand. An entity can move only in a circle, because we want to keep it at a specified location. The space in which it can move determine the circle radius.


States loop:
  1. Calculate the angle of movement
  2. Go to the boundary of circle
  3. Standing
  4. Go to the center of circle


Hen

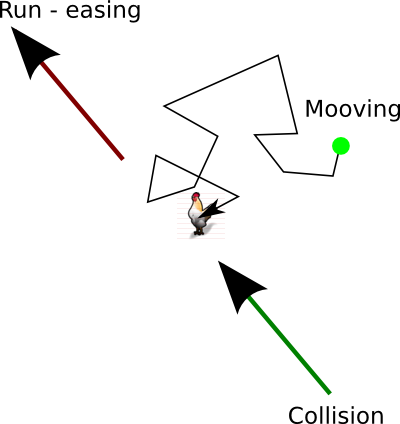
A entity slowly moves across the surface. After contact runs. It has states: graze, run. Moving space is unlimited, but for border it can use the same technique as example above. After contact with the player it uses “easing” technique.


States loop:

  1. Short random movement
  2. Standing
  3. Short random movement
  4. If collision -> running


Conclusion

Using the states we can define any behavior for our entity. Such code is clear, understandable and reusable.

It might interest you


Tuesday, March 12, 2013

Interactive dialogue for HTML5 game - part 2

In the previous post I proposed data structure for interactive dialogues for video game. Within a few nights, I cooked GUI Tool Dialogues builder for compose dialogues. In this post I show you how that tool to use.

Examples


Dialogues builder

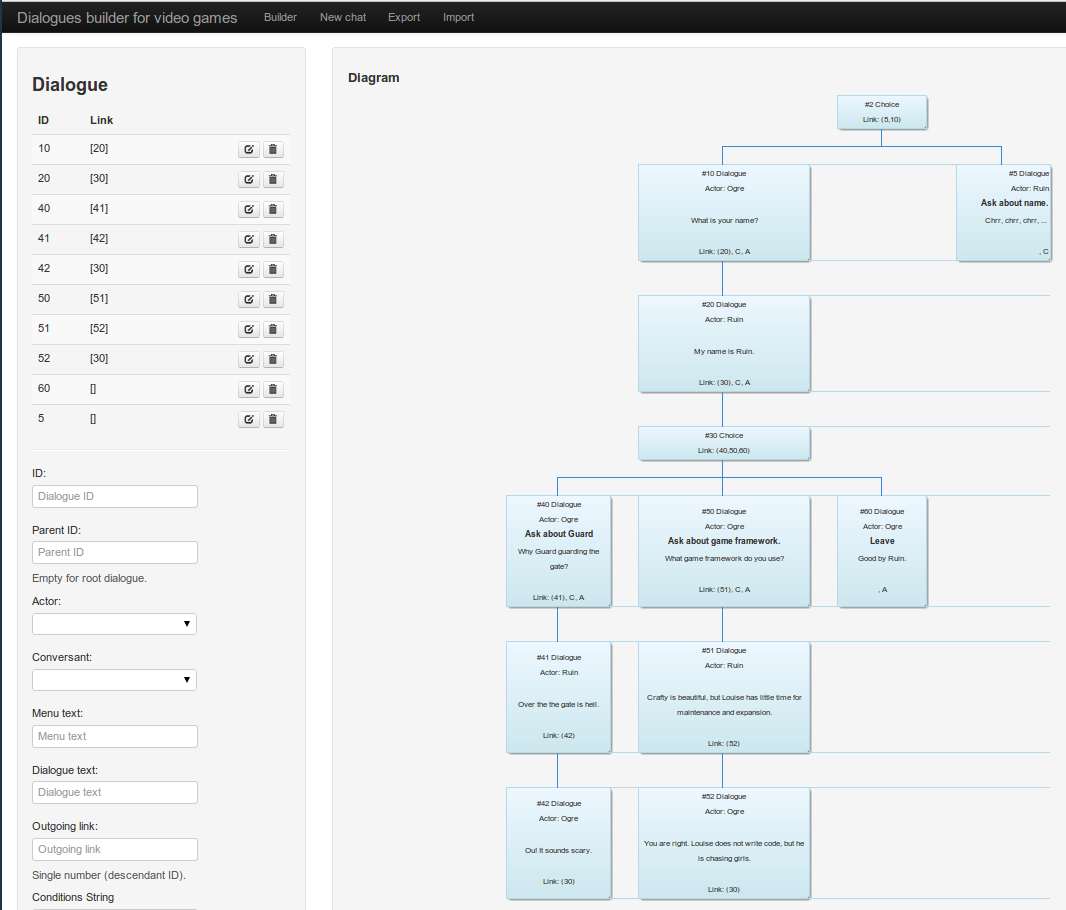
Dialog Builder is GUI tool for creating interactive dialogues for video games. Because the exported format is JSON you can use it in any programming language.


Work procedure

  1. Add actors for dialogues.
  2. Add dialogs and choices.
  3. Export data as JSON.

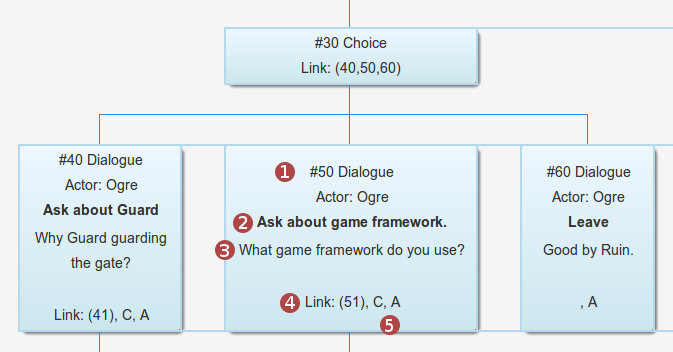
Dialogue description


  1. ID and type ( dialogue | choice )
  2. Menu text: may be empty if parent is dialogue
  3. Dialogue text
  4. Link: ID of ancestors
  5. Contains: C - condition, A - code after, B - code before

Dialogue as data


It may interest you to know


Tuesday, February 12, 2013

Interactive dialogue for HTML5 game - part 1

In this post I do not want to deal with theories of dialogue. I will try to summarize the requirements for the implementation of dialogue in a computer game. In the next post I am going to implement such a tool.


Type of dialogs:

  • Linear
  • Linear interrupted
  • Linear dialogue with questions
  • Branched dialogue with different results
  • Fake branched dialogue with the same end
  • Procedural dialogue
  • Combined dialogue

Linear dialogue

Example:
  • Start: player: Do you know anything about the cave outside the village?
  • 1 character:   People is losing there.
  • 2 player: How to get there?
  • 3 character: Follow the river.
  • 4 player: How much time does it take path.
  • End: About 14 hour.


Linear interrupted

A player may ask follow-up questions.

Example:

  • 1 character:   People is losing there.
    • 1a player: Tell me more please.
    • 1a character: ...

  • 3 character: Follow the river.
    • 3a player: I need a guide.
    • 3a character: ...


Linear dialogue with questions

Extension topics are in a separate thread. May contain more information. Information thread can still be active, even if you repeat the dialogue. Information thread may include comprehensive encyclopedic knowledge, such as the history (Vietcong 2).


Branched dialogue with different results

Large amounts of data, even in a short dialogue.


Fake branched dialogue with the same end

The player has the feeling that the conversation affects.


Procedural dialogue

It contains variables that affect the result of conversation.


Key features


  1. Visualization (GUI tool )
  2. Conditions
  3. Variables
  4. Outgoing Links
  5. Export to JSON


1. Visualization
I am going to do a GUI tool (dynamic HTML form) for designing dialogue. GUI tool also will be able to show dialogue graph.

2. Conditions
Ability to show and hide a branch based on conditions. (See Procedural dialogue).

Example:

  • isFirstVisit == true
  • hasSword == true
  • mood >= 10
  • inventory.contains(“amulet”)

3. Variables
Can set variables, increment, decrement. (See Procedural dialogue).

Example:

  • hasSword = true
  • mood += 2

4. Outgoing Links
Each item can have a reference (0..*) to another item in the dialog.

5. Export to JSON
I am going to export data structure in JSON. Despite its relationship to JavaScript, it is language-independent, with parsers available for many languages.


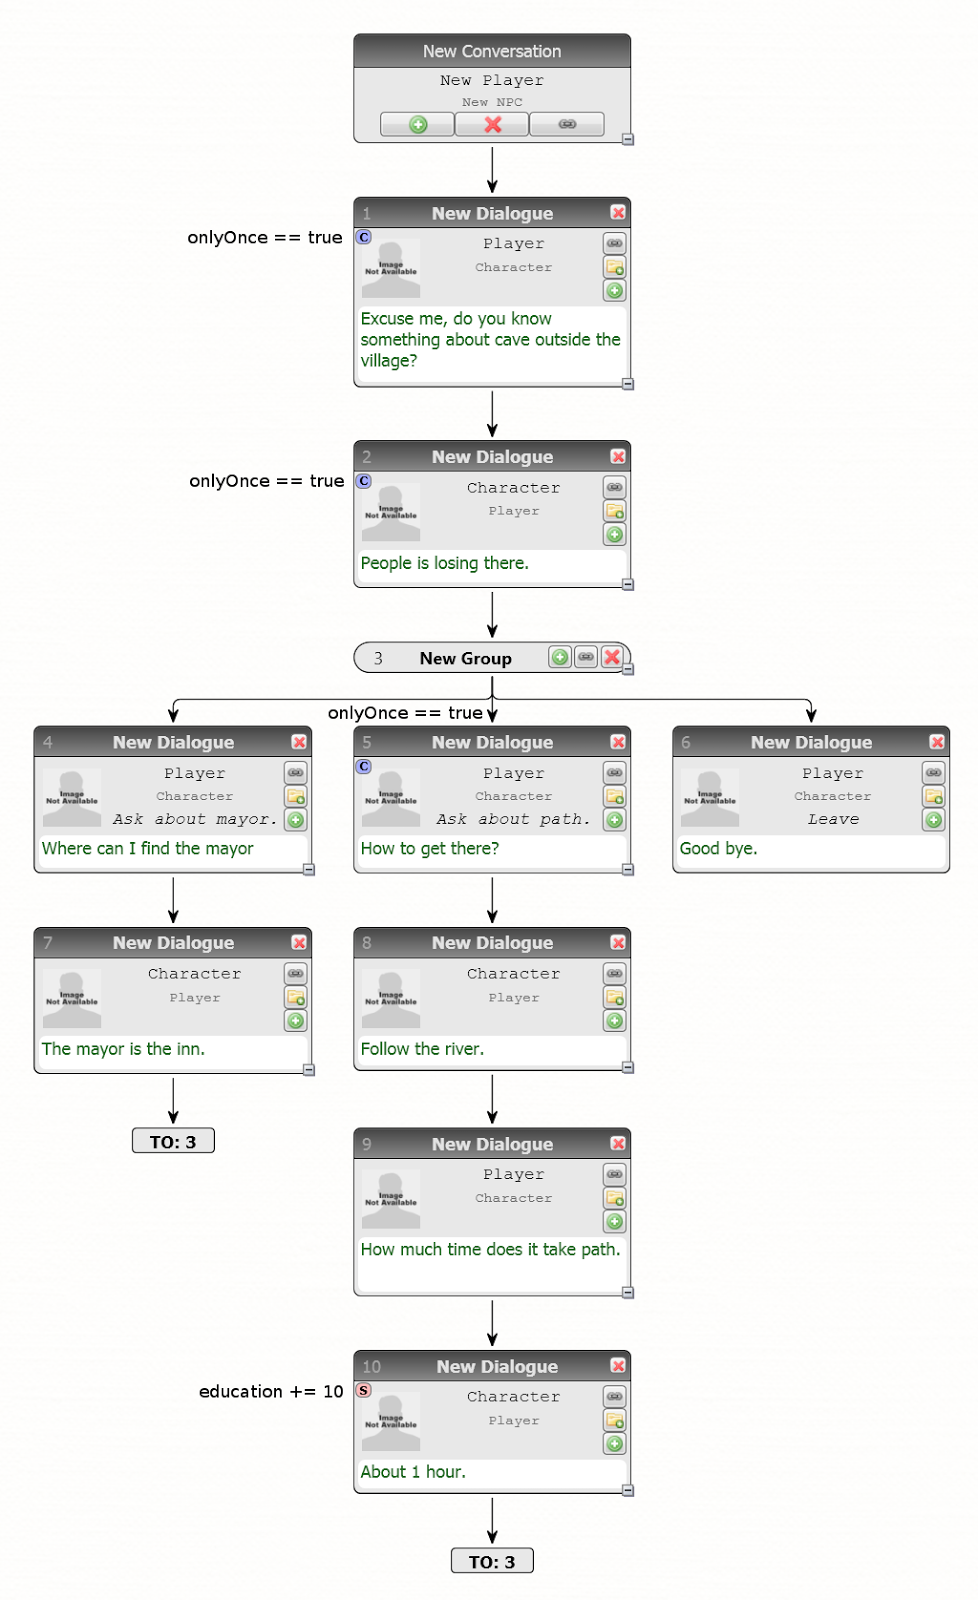
Example of dialogue

Simple dialogue, but contains: links, conditions, variables.


Proposed JSON


It may interest you to know

Chat Mapper
Chat Mapper is tool for writing and testing nonlinear dialogue, especially for video games and training. Free for noncommercial use (no export).

Article
How Video Game Stories Are Written

Friday, January 18, 2013

Performance Testing with JMeter


The JMeter is desktop/ command line Java application designed to load test functional behavior and measure performance. It was originally designed for testing Web Applications.

This article shows how to use it for testing webapps.


Preparations


  • Install JMeter on your laptop. On Linux is as package in some central repositories.
  • Install htop on your server. htop is top on steroids. You can find it on rpmforge repos.


Getting Started

It shows how to define basic request for server and dump reports.

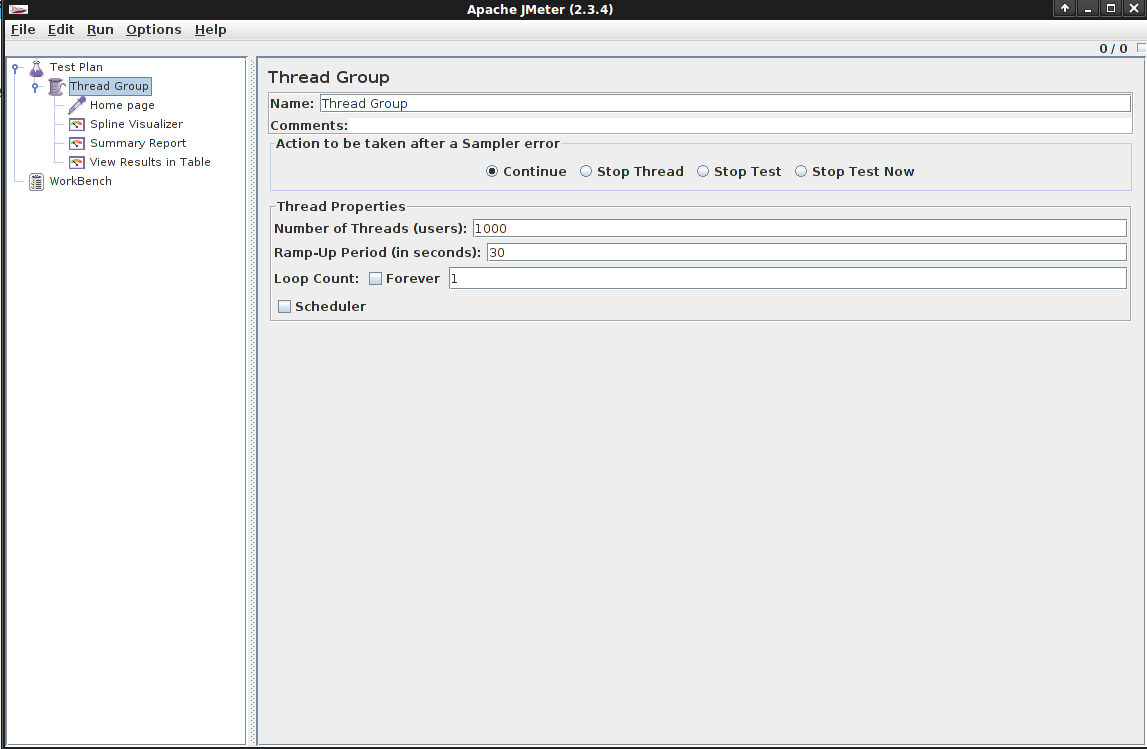
1. Adding Thread Group to Test Plan

  • Number of Threads: Defines how many threads (users) will access to the server.
  • RampUp Period: In what time period the requests shall be made. Zero means immediately.


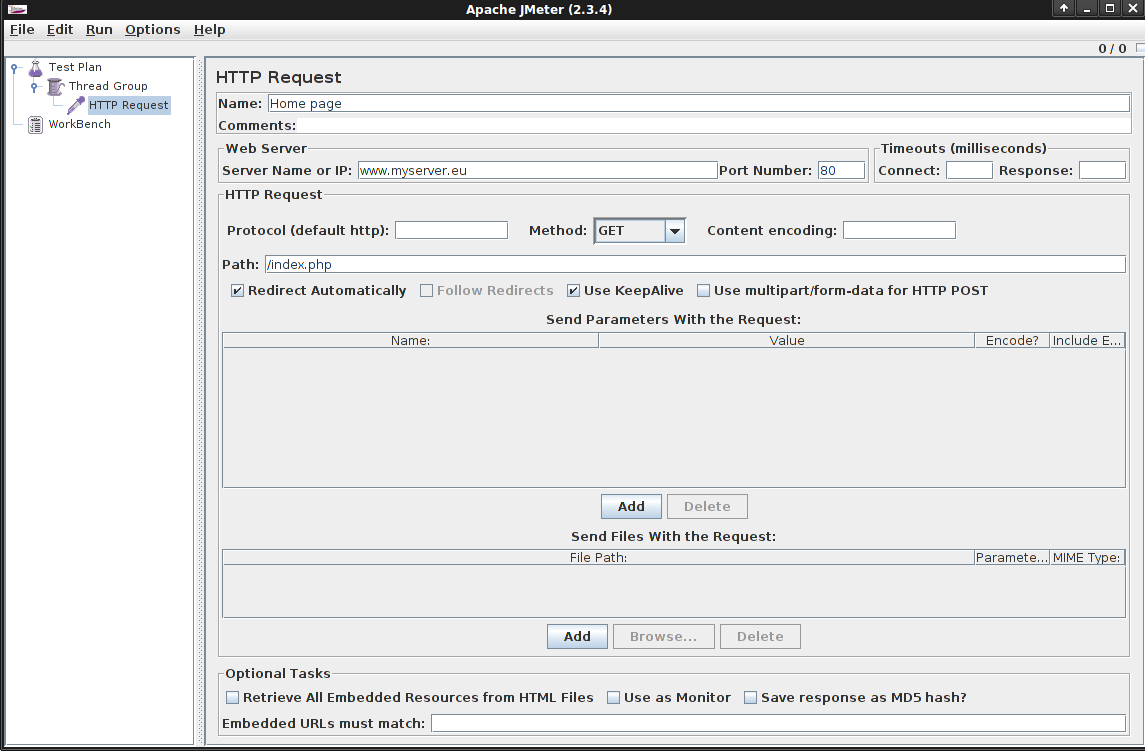
2. Adding Reguest to Thread Group
Type in the Server name, Port number, Path.


3. Adding Listeners to Thread Group
Listeners used to capture and presentation of results.
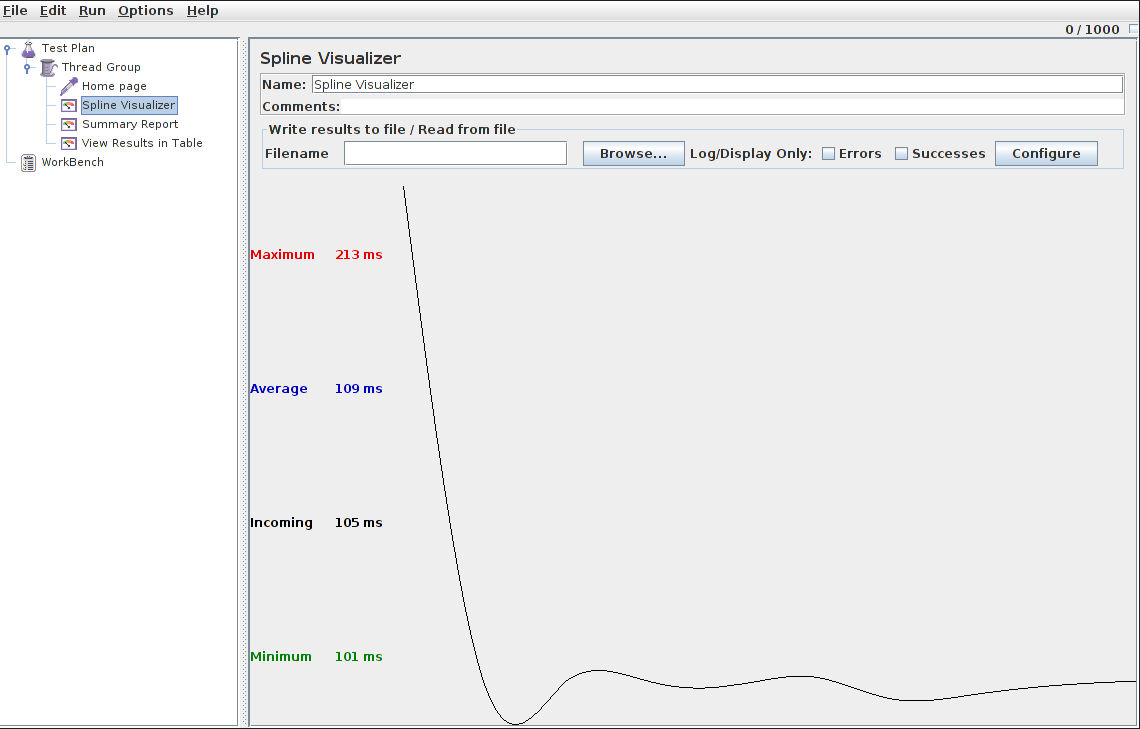
For example: Spline Visualizer, Summary Report, View Requests in Table.


4. Starting basic test.
Go to server and run htop for watching server status dynamically. You can see: CPU and memory usage, Swap usage, processes, …

From JMeter main menu Run>Start. During testing watch the behavior of the server on htop console. It may help to understand more your server.

After completing the test explore results in Listeners sections: errors, times, responses,...


Using proxy server for recording complex requests


For a definition of complex requests is best to use the HTTP Proxy Server.
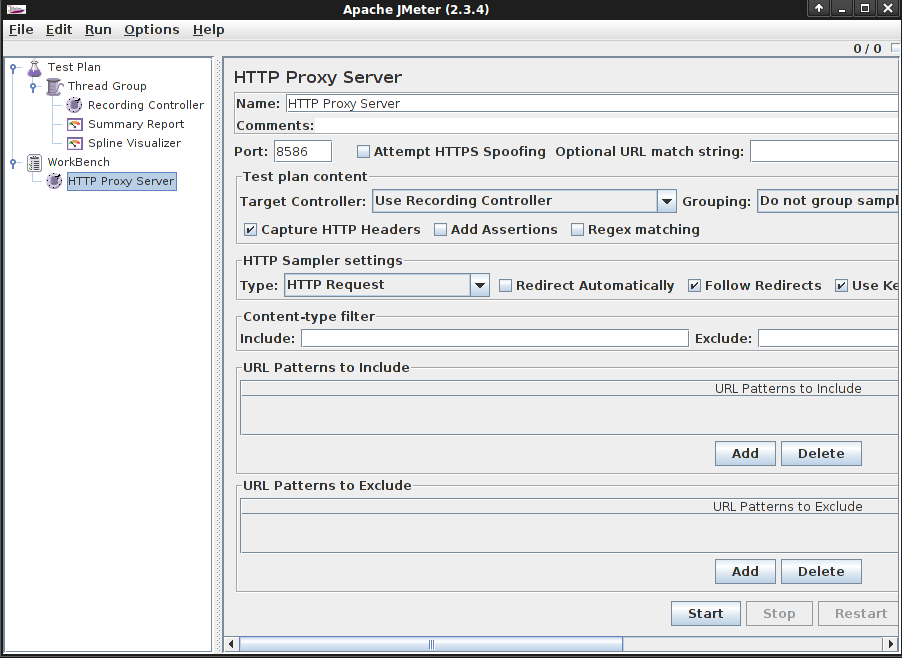
  1. Insert HTTP Proxy Server component to WorkBench fork. Define port and click to Start button.
  2. Insert Recording Controller to Thread Group.


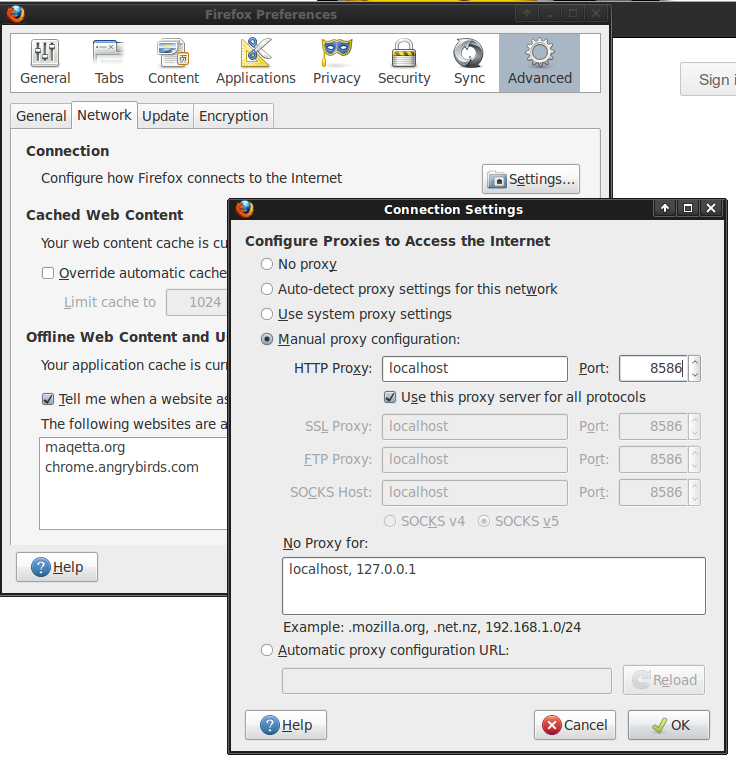
Connecting to HTTP Proxy Server
Go into the settings of your favorite web browser and connect to the proxy server.


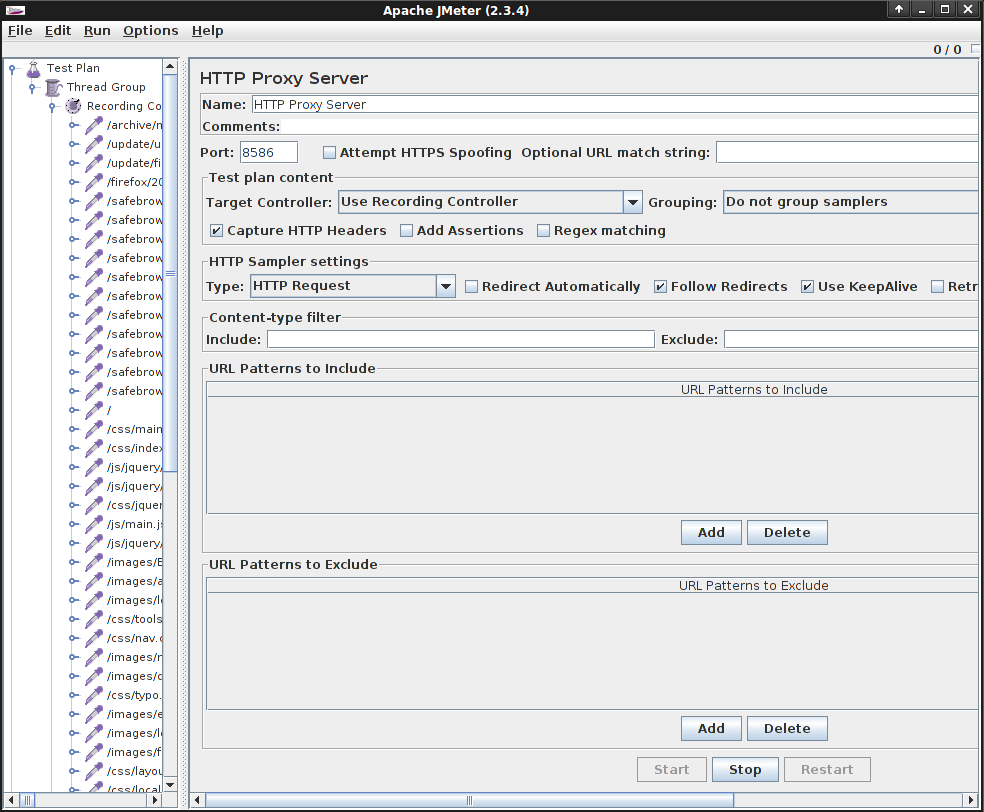
Now, in your web browser go to your webapp and make requests. For example fill out and submit the form. All your requests are stored in the Record Conroller.


At the end don´t forget stop the HTTP Proxy server. Start test and watch results.

Conclusion

JMeter offers a lot of others components: Timers, Logic Controllers, Assertions for checking responses. You can test SOAP and XML/RPC services, JDBC connections, FTP requests.

JMeter can be run from the command line. You can test automatically from scripts, or on server without GUI.

Thursday, December 6, 2012

Email confirmation after sending Google form

Google Apps Script is a scripting language that provides easy ways to automate tasks across Google Drive. 

This tutorial explains a script that sends an email confirmation after submitting the Google Form.

Sending email from GAS is very simple:

function sendEmail() {
    MailApp.sendEmail(“customer@gmail.com”, “Confirmation”, “Hello customer.”);
}

Usually there is a need to customize the email body. For example from Google Spreadsheet:


function sendEmail() {
    var message = “Hi ${firstname} ${lastname}, Thank you for buying gun.”
    MailApp.sendEmail( email , “Confirmation”, message);
}

After submitting Google Form script finds the last row in the spreadsheet and puts value instead of the column name. For example from ${firstname} to John.

When you want to send a comprehensive email, it might be better to use HTML email body.
function sendEmail() {    
  var message = createTemplateFromFile( TEMPLATE_FOR_CUTOMER );
  MailApp.sendEmail( email, “Confirmation”, "", {htmlBody: message});
}

HTML template for customer


And this is the idea of ​​the script. After submitting Google Form script finds last row from spreadsheet and puts value to html template. HTML template, you can change and expand as your needs. Filled template is used as email body.


Trigger
The last important task is to set the trigger. From the main menu of Script Editor click to:
Resources > All your triggers


Source code can be downloaded from: Github.

Links


Recommendation

I was inspired by a great book Google Apps Script for Beginners


The book contains:

  • Spreadsheet automation
  • Manipulate Forms
  • Managing Email Account
  • Script in text document
  • Standalone Web application

Sunday, December 2, 2012

Import Gaelyk project to Eclipse IDE

Gaelyk is a lightweight Groovy toolkit for Google App Engine Java and have a good documentation.

Since the Musketyr published Gradl-gaelyk-eclipse-plugin, we can develop a Gaelyk project in comfort of Eclipse IDE.

This tutorial shows how to start a Gaelyk project in Eclipse.


Course of action


  1. Download Gaelyk Template project
  2. Fix gradle.build
  3. Import project to Eclipse
  4. Set project WAR directory
  5. Set App Engine
  6. Refresh Gradle dependencies
  7. Run project


Download Gaelyk template project


You can download Gaelyk Template project from Gaelyk website or visit Gaelyk on Github. The current version - v1.2 - of Template project on Gaelyk website contains a build problem, which is already fixed, but it is not included in zip package of the Template project on Gaelyk websites.


Fix gradle.build


After downloading the package, it is necessary to change the file gradle.build.

eclipse { 
  classpath { 
    plusConfigurations += configurations.functionalTestRuntime 
  } 
} 


Import project to Eclipse


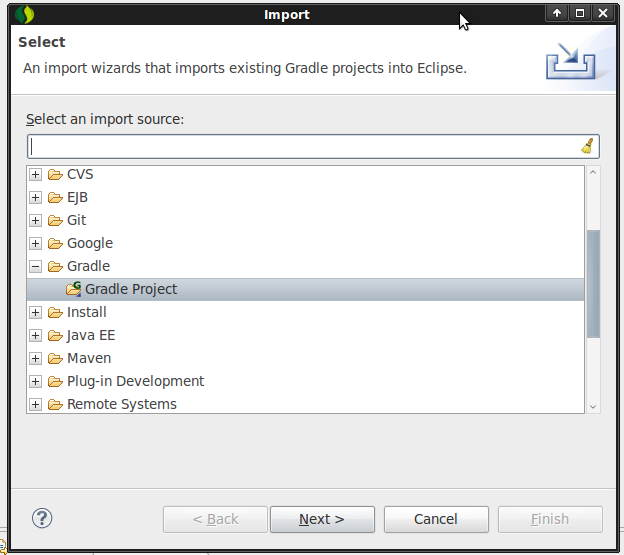
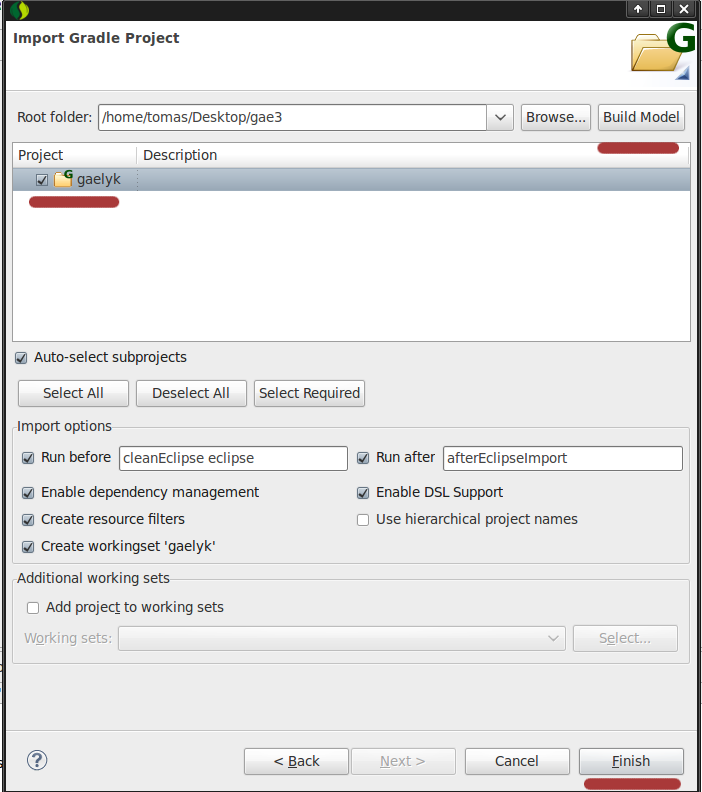
Import the project into Eclipse IDE with Gradle plugin:

File > Import


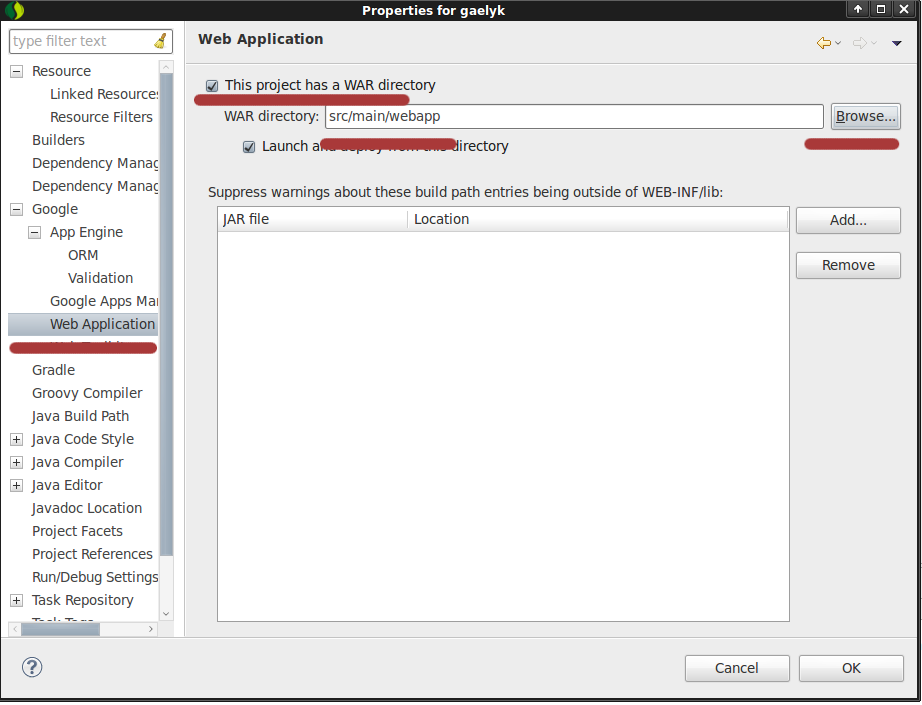
Set project WAR directory


After import set project WAR directory:


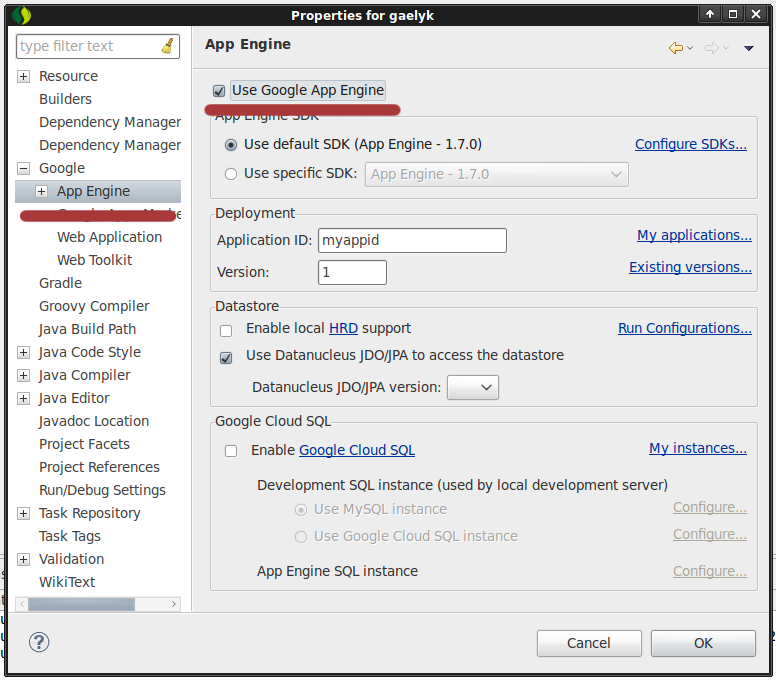
Set App Engine


Refresh Gradle dependencies


Next step is refresh dependencies:

Right click on Project name > Gradle > Refresh All


Run project


Then you run the project as a Web Application:

Right click on Project name > Run As > Web Application


Links


Monday, April 25, 2011

DCS-950G streaming in Linux

Yesterday I got IPcam DCS-950G. I wanted to connect camera to Motion but it did not get stream. I had to use stupid IE only. I was angry and looking for solution. I found people just as disappointed as I am. I decided to solve this problem.

I went to D-Link and study specification. After that I downgrade camera to DCS-950G_ A1_Firmware_v1.00 because the camera with this old firmware does not need admin authentication for streaming. It's so convenient. I do not have to send with each request the password.

I wanted to write a Groovy script, but I wanted to control the camera from the router, which I do not have Java. That's why I chose Bash.

After hours of testing, I had written a working script:

#!/bin/bash
#

WEBCAM_IP="192.168.0.20"

#######################################################################

#init
{ exec 3<>/dev/tcp/${WEBCAM_IP}/5000; echo -n "ARAGORN_INIT" >&3; cat <&3> /dev/null; } &

sleep 2

#start
exec 3<>/dev/tcp/${WEBCAM_IP}/5001
echo -n "ARAGORN_START#255055293901165#0#1#0" >&3

#data
while :
do
 
    head -c 40 <&3 > header.hex
    BYTES=( `hexdump -v -s 24 -n 4 -e ' 1/1 "%02X " ' header.hex` )      
    HEX="${BYTES[3]}${BYTES[2]}${BYTES[1]}${BYTES[0]}"   
    DATA_LENGTH=`echo "obase=10; ibase=16; ${HEX}" | bc`  
    head -v -c "${DATA_LENGTH}" <&3
                                
done


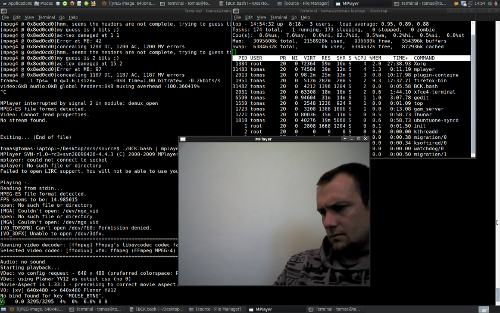
With MPlayer I can play the stream directly from the camera. Mplayer takes around 5% CPU on a single camera. 
./dcs-950G.bash | mplayer - -demuxer mpeg4es


With ffmpeg I got every second  actual jpeg for Motion.