Tuesday, August 13, 2013

Converting video for web with FFmpeg

The plight of the HTML5 video format is bad and it looks like that will soon not change.


Formats overview:
  • WebM ( video codec: VP8, audio codec: Vorbis )
  • OGG ( video codec: Theora, audio codec: Vorbis )
  • MP4 ( video codec: H.264, audio codec: ACC/ MP3 )
  • Flash video ( video codec: H.264, audio codec: ACC/ MP3 )


MediaInfo
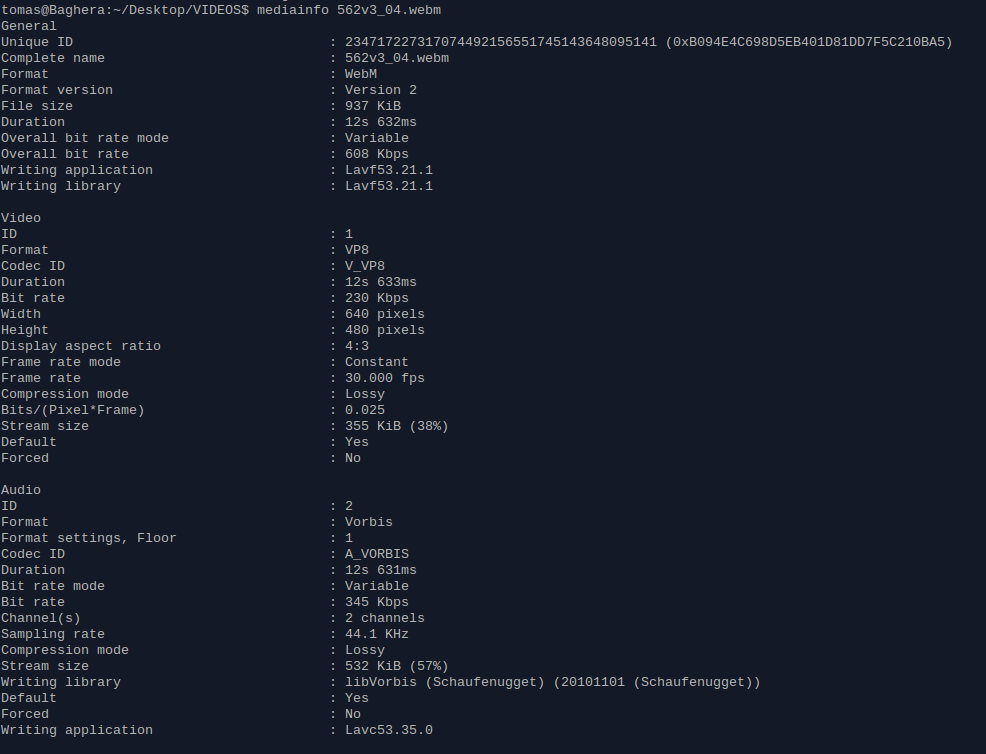
MediaInfo is a tool for reading video files metadata. Using it is very simple:

FFmpeg
FFmpeg is tool for converting audio and video files. It uses libavcodec library. Converting video files with FFmpeg to required formats ist simple:


WebM
ffmpeg -i INPUT_FILE -acodec libvorbis -vcodec libvpx -b 400k OUTPUT_FILE.webm


OGG
ffmpeg -i INPUT_FILE -acodec libvorbis -vcodec libtheora -b 400k OUTPUT_FILE.ogg


MP4
ffmpeg -i INPUT_FILE -acodec libfaac -vcodec libx264 -b 400k OUTPUT_FILE.mp4


Parameters:
  • -acodec: audio codec, or -c:a in new release of FFmpeg
  • -vcodec: video codec, or -c:v in new release of FFmpeg


There are a lots of others interesting parameters.


libfaac
For the libfaac codec you need the FFmpeg compiled with --enable-libfaac. For more details read FFmpeg Wiki. Or you can use libvo_aacenc codec:
-acodec libvo_aacenc


Bash script for converting video
For painless conversions you can use a prepared bash script.


Use:
  • ./web_video_converter.sh MY_VIDEO_FILE.avi
  • ./web_video_converter.sh FOLDER_WITH_VIDEOS

Monday, July 1, 2013

HTML5 game - decision tree

Most game entity, that you create for your HTML5 games needs our own intelligence. It has to decide what to do next. For example: walks, attacks, speaks, … In this post I show you how to make decision with decision tree.


Consider the following scenario:


This type of the presentation is easy to represent in the form of a tree:


It is better to convert each condition on a separate object. Then you can check the condition and return either a decision or another decision object.


Finally, you need to create the tree and let it make the decision:


Reference:


Thursday, June 6, 2013

Google Closure - custom events in examples

Google Closure Library provides powerful handling system for managing events and listeners across browsers. Closure makes it possible to manage user-defined events too. With Google Closure Library you do not need to create your own Events system.


There are responsible classes in goog.event package. Headstones of google.event package are:
  • goog.events.listen()
  • goog.events.unlistenByKey(key);
  • goog.events.EventTarget
  • goog.events.Event
  • goog.events.EventHandler


Basic use
For basic use you make do with the function goog.events.listen(). Remove listener before destroying object is very important. You do not want memory leaks in your application. But hold reference to key it is inconvenient (read more). You could also be interested in the method goog.events.listenOnce().


Create custom event

The base event object is a goog.events.Event. If you build user defined events you will probably need to extend this class.

Create event target
An EventTarget is an object that can dispatch events. The most common example of an EventTarget is a DOM element but you can define your own EventTarget by inherit from class goog.events.EventTarget. You could also be interested that goog.events.EventTarget extends goog.Disposable. The object responsible for release object reference such as DOM nodes, COM object and register listeners. Subclass of goog.events.EventTarget can register listeners and dispatch events.

Manage listeners
Subclass of goog.events.EventHandler is useful in the release of listeners. After calling method dispose() it release all references to listeners. You can combine it with class goog.Disposable as mentioned bellow.

Monday, May 27, 2013

Create custom tileset in Gimp

There are lots of nice tilesets on Internet for game developers. Some resources you see at the end of this blogpost. For your game you probably need tiles from more tilesets or just some tiles from a large tileset. In this tutorial I show you how to prepare your own tileset for game in excellent image editor Gimp.

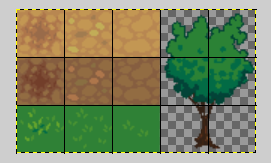
For my game I need only trees and some ground from nice 32x32 tileset that I found on opengameart.org.

Prepare grid

1. Open the source tileset: File > Open
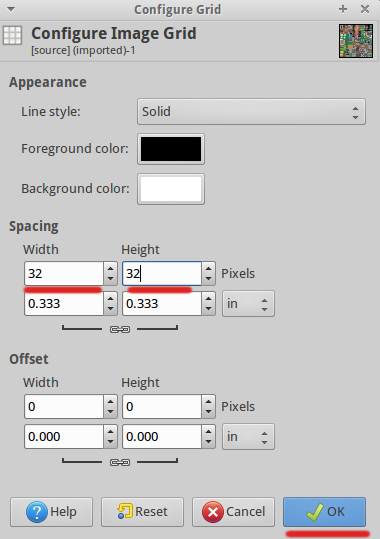
2. Set grid spacing: Image > Configure Grid...

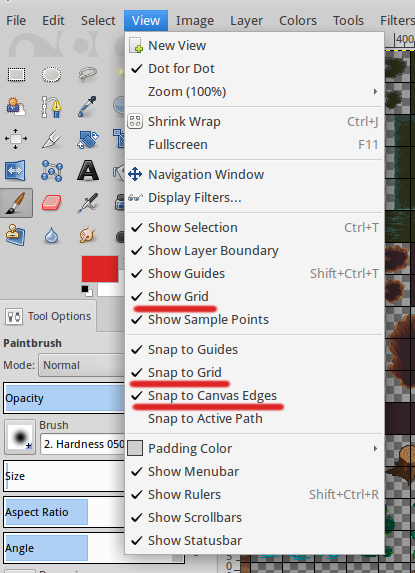
3. Show grid:
View > Show Grid
View > Snap to Grid
View > Snap to Canvas Edges

New tileset

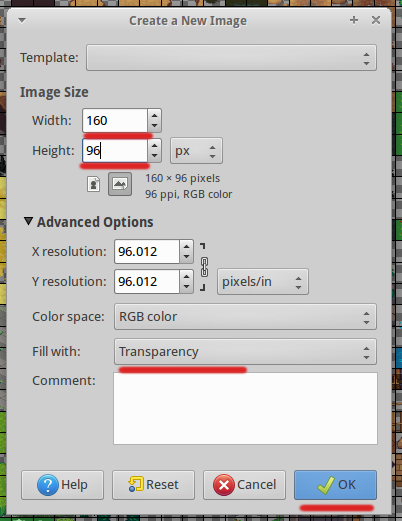
1. Create new Image: File > New
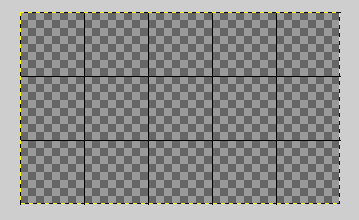
Set size. For width I set 5 * 32, For height I set 3 * 32.

2. Set the same grid property as above.

Copy tiles from source to destination

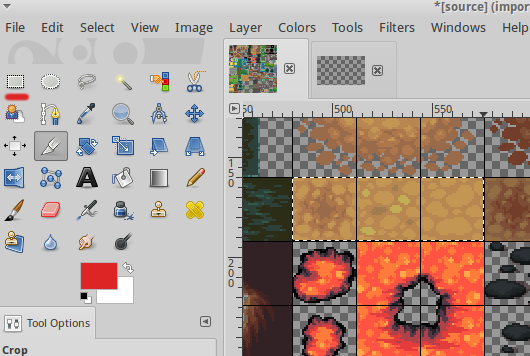
1. Copy tile to new tileset: Use Rectangle Select Tool and select tile or tiles from source tileset. (I used Zoom Tool too).

2. Copy tile: Edit > Copy
3. Paste tile: Switch to the prepared new image. Edit > Paste
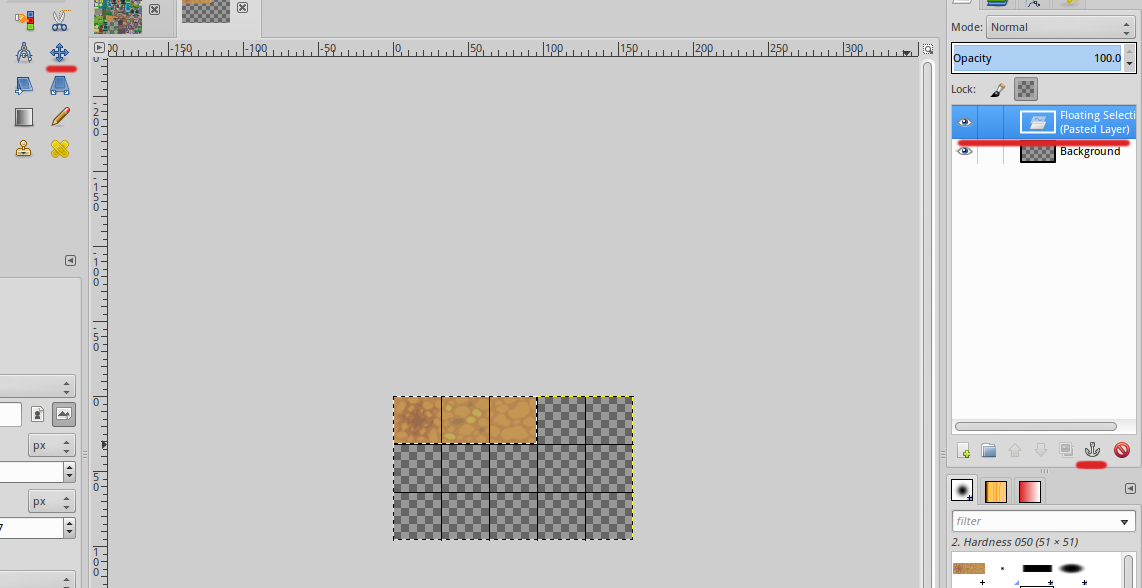
4. Place the tile to grid. Use Move Tool. Because you have previously set Snap to Grid, the tile will be glued to the grid.

5. Merge layer. After copying the tiles there was a new layer - Pasted layer. Click on the anchor icon to merge layers into one. (See image above.)
6. Add more tiles with the same procedure.

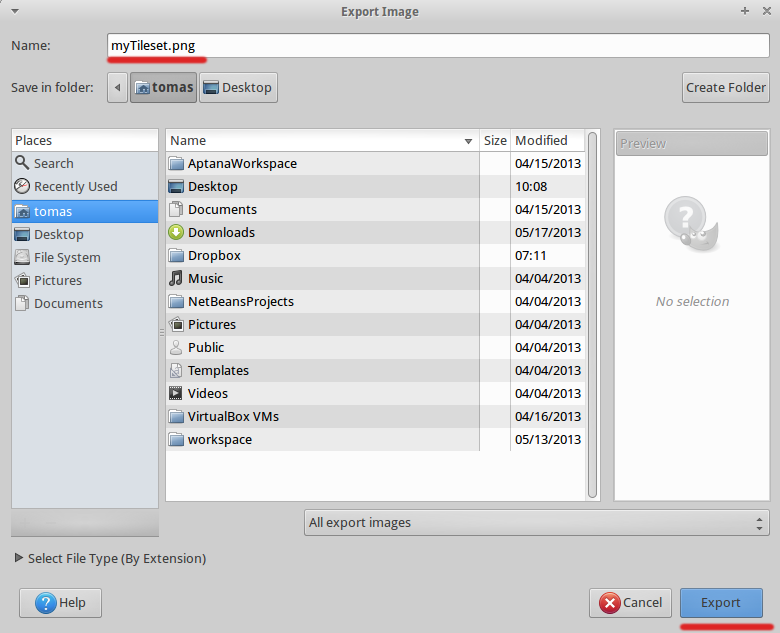
7. Save your new tileset as PNG.
Gimp 2.6: File > Save As
Gimp 2.8: File > Export

Tileset resource


Friday, April 19, 2013

Game Entity controlled states

In this post I'll show how to create a game entity controlled states.


Standing

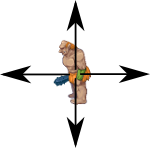
A entity has only one state: stand. It is very easy to implement. It is quite common that after some period of inactivity entity performs some action. For example, it looks around, shuffle around, etc.


Our entity turns direction after some time of inactivity.


Looking


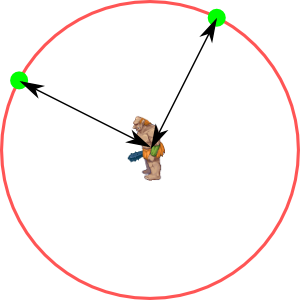
A entity has two states: moveTo, stand. An entity can move only in a circle, because we want to keep it at a specified location. The space in which it can move determine the circle radius.


States loop:
  1. Calculate the angle of movement
  2. Go to the boundary of circle
  3. Standing
  4. Go to the center of circle


Hen

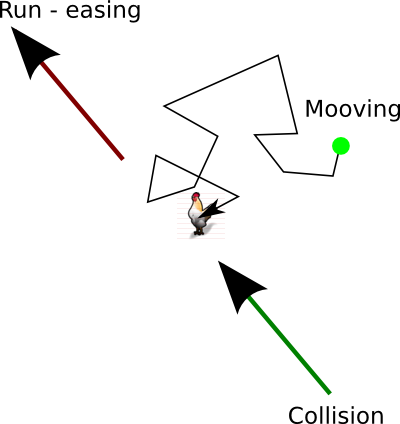
A entity slowly moves across the surface. After contact runs. It has states: graze, run. Moving space is unlimited, but for border it can use the same technique as example above. After contact with the player it uses “easing” technique.


States loop:

  1. Short random movement
  2. Standing
  3. Short random movement
  4. If collision -> running


Conclusion

Using the states we can define any behavior for our entity. Such code is clear, understandable and reusable.

It might interest you


Tuesday, March 12, 2013

Interactive dialogue for HTML5 game - part 2

In the previous post I proposed data structure for interactive dialogues for video game. Within a few nights, I cooked GUI Tool Dialogues builder for compose dialogues. In this post I show you how that tool to use.

Examples


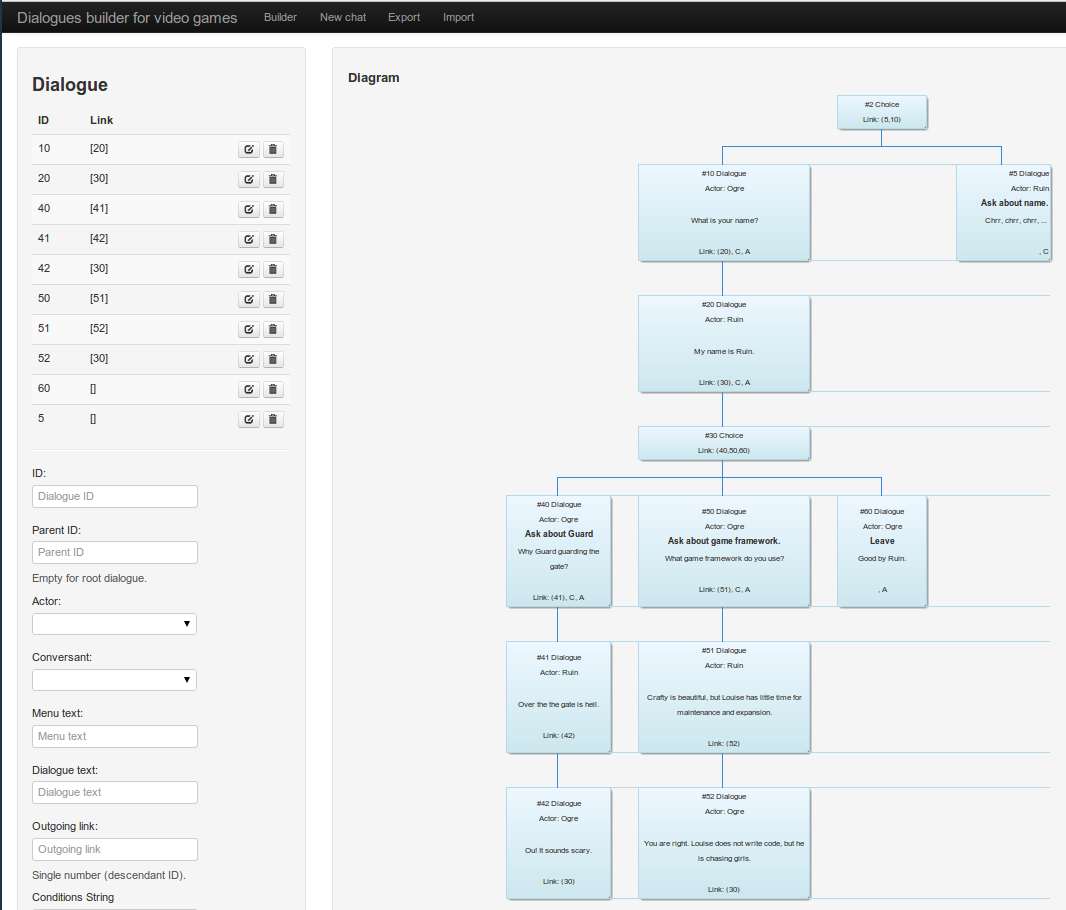
Dialogues builder

Dialog Builder is GUI tool for creating interactive dialogues for video games. Because the exported format is JSON you can use it in any programming language.


Work procedure

  1. Add actors for dialogues.
  2. Add dialogs and choices.
  3. Export data as JSON.

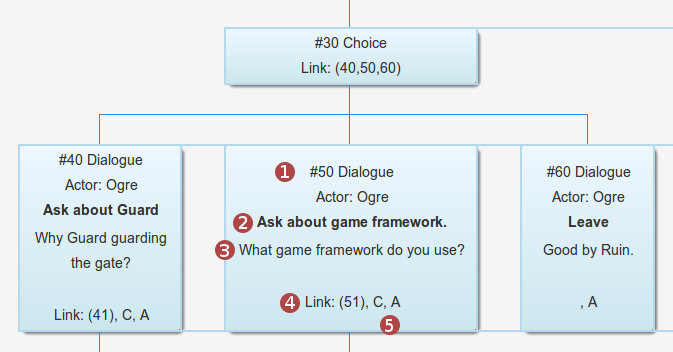
Dialogue description


  1. ID and type ( dialogue | choice )
  2. Menu text: may be empty if parent is dialogue
  3. Dialogue text
  4. Link: ID of ancestors
  5. Contains: C - condition, A - code after, B - code before

Dialogue as data


It may interest you to know